Crosley Record Player Owners Manual: A Comprehensive Guide
Welcome! This manual provides essential guidance for your Crosley record player, ensuring optimal performance and longevity. Before use, carefully review all instructions and safety precautions detailed within this comprehensive guide for a delightful listening experience.
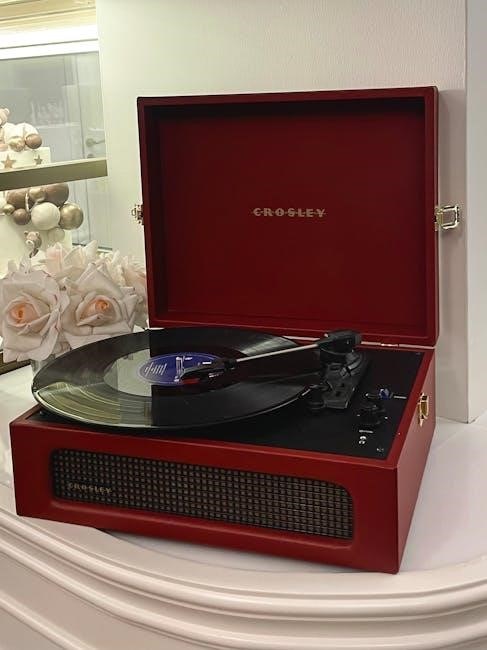
Congratulations on choosing a Crosley record player! You’ve joined a legacy of enjoying music in its purest, most authentic form. This turntable is designed to bring the warmth and character of vinyl records into your home, offering a unique listening experience distinct from modern digital audio. Before diving in, please take a moment to familiarize yourself with this manual.
This guide will walk you through everything from initial setup and safe operation to troubleshooting and maintenance. We understand that setting up a new device can sometimes be daunting, so we’ve made these instructions as clear and concise as possible. Remember to retain this manual for future reference, as it contains valuable information regarding your record player’s features and care. Contact customer service if you encounter any issues before returning to the store.
Unboxing and Initial Setup
Carefully unpack your Crosley record player and verify that all components are present. The box should contain the turntable, a power adapter, and potentially additional accessories depending on your model. Inspect each item for any signs of damage that may have occurred during shipping. If anything is missing or damaged, immediately contact Crosley customer service for assistance – do not attempt to use a damaged product.
Place the record player on a stable, level surface, away from direct sunlight, extreme temperatures, and excessive dust. Connect the power adapter to the turntable and then to a wall outlet. Before playing any records, ensure the turntable is properly grounded, if applicable. Refer to the ‘Speaker Connections and Setup’ section for audio output configuration. Always read and understand the entire manual before operation.
Safety Precautions
Important: To ensure safe operation and prevent potential hazards, adhere to the following precautions. Never use the record player near water or expose it to liquids of any kind. Operate only with the specified power source indicated on the product’s marking label. Do not defeat the safety purpose of the polarized plug – if it doesn’t fit, don’t force it; consult an electrician.
Protect the power cord from damage, especially at plugs and outlets. Avoid overloading wall outlets or extension cords. Never insert objects into the product openings, as this could cause electric shock or fire. Do not attempt self-repair; refer servicing to qualified personnel. Unauthorized modifications may void your warranty and compromise safety. Use only recommended attachments to prevent hazards.
Important Safety Instructions
Read Carefully: Before operating your Crosley record player, thoroughly understand these crucial safety instructions. Avoid using the device near water sources to prevent electric shock. Only utilize a power source matching the specifications on the product label. Do not tamper with the polarized plug; it’s designed for your safety. If the plug doesn’t insert easily, reverse it or consult an electrician – forcing it is dangerous.
Protect the power cord from physical damage, particularly at connection points. Overloading outlets or extension cords poses a fire risk. Never insert objects into the unit’s openings, and avoid liquid spills. Unauthorized repairs can be hazardous; seek qualified service. Modifications may void your warranty and compromise safety standards. Always use recommended attachments.
Electrical Safety Guidelines
Power Source: Ensure your Crosley record player is connected to a properly grounded electrical outlet matching the voltage specified on the device’s label. Never use damaged power cords; replace them immediately. Avoid using extension cords if possible, and if necessary, choose one rated for the appliance’s power consumption. Disconnect the player from the outlet during lightning storms or prolonged periods of non-use.
Do not attempt to repair the power cord yourself. Improper repairs can create a serious electrical hazard. Keep the power supply dry and away from heat sources. Avoid handling the plug with wet hands. If the appliance exhibits any signs of electrical malfunction, such as sparking or unusual odors, disconnect it immediately and contact customer service for assistance. Prioritize electrical safety at all times.
Understanding the Components
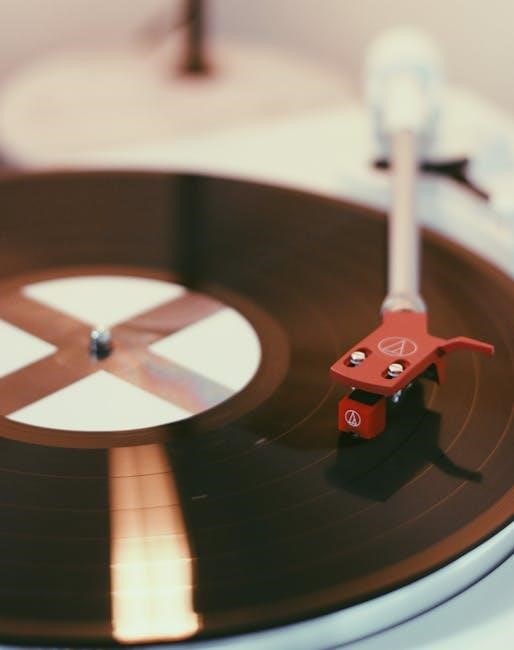
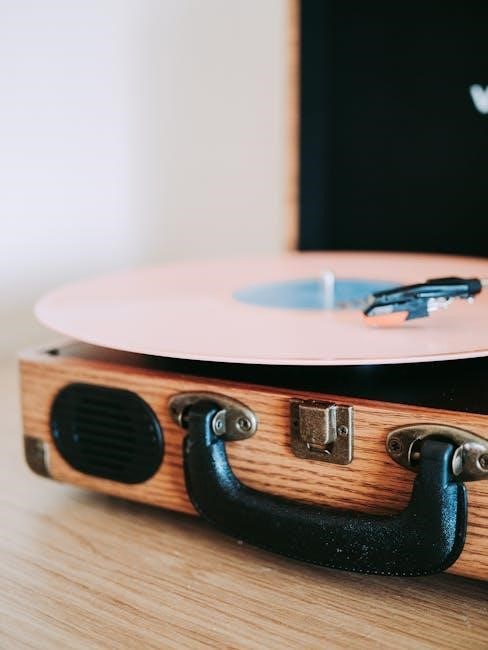
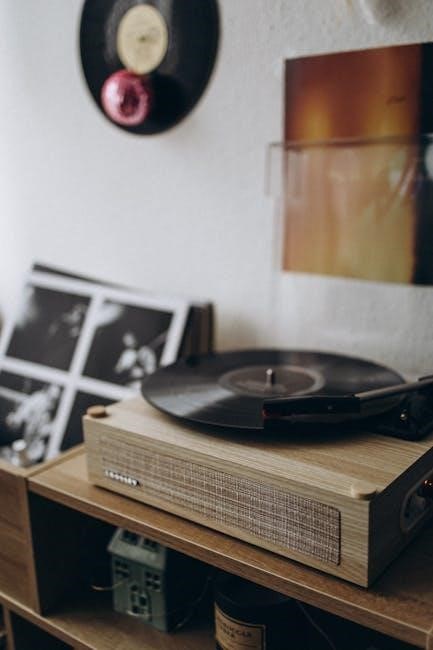
Familiarization is Key: Your Crosley record player consists of several key components working in harmony. These include the turntable platter, responsible for rotating your vinyl records; the tonearm, housing the cartridge and stylus which read the grooves; and the motor, powering the platter’s consistent speed.
Additionally, you’ll find the control panel with power, speed selection (33 1/3, 45, 78 RPM), and playback controls. Integrated speakers or outputs for external speaker connections are also present. Understanding each part’s function is crucial for proper operation and maintenance. Refer to the detailed parts identification section for a visual guide to each component and its location on your specific model.
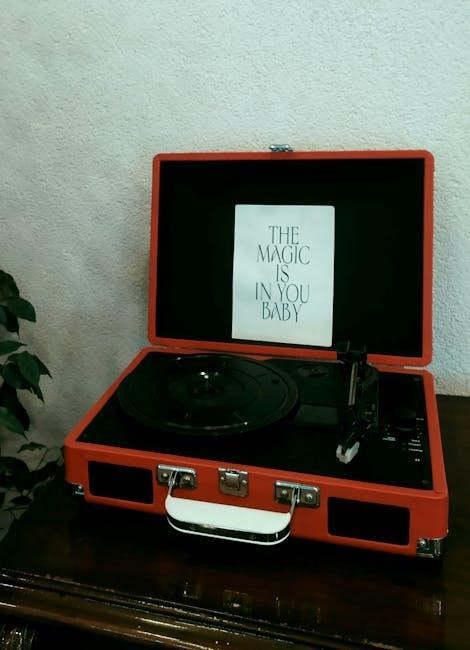
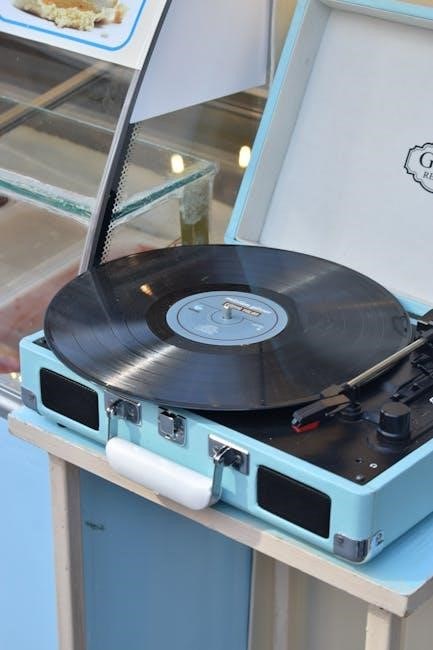
Record Player Parts Identification
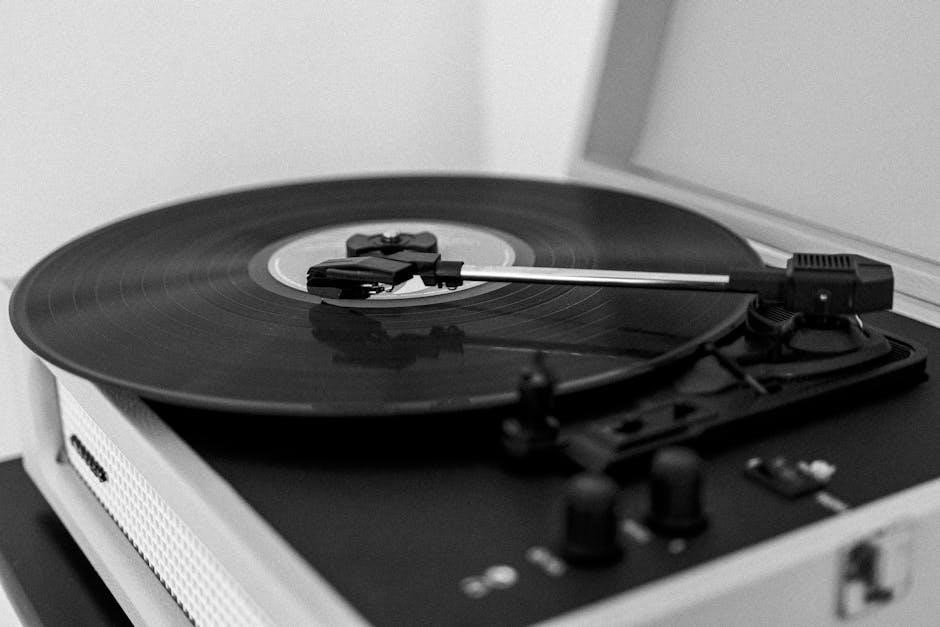
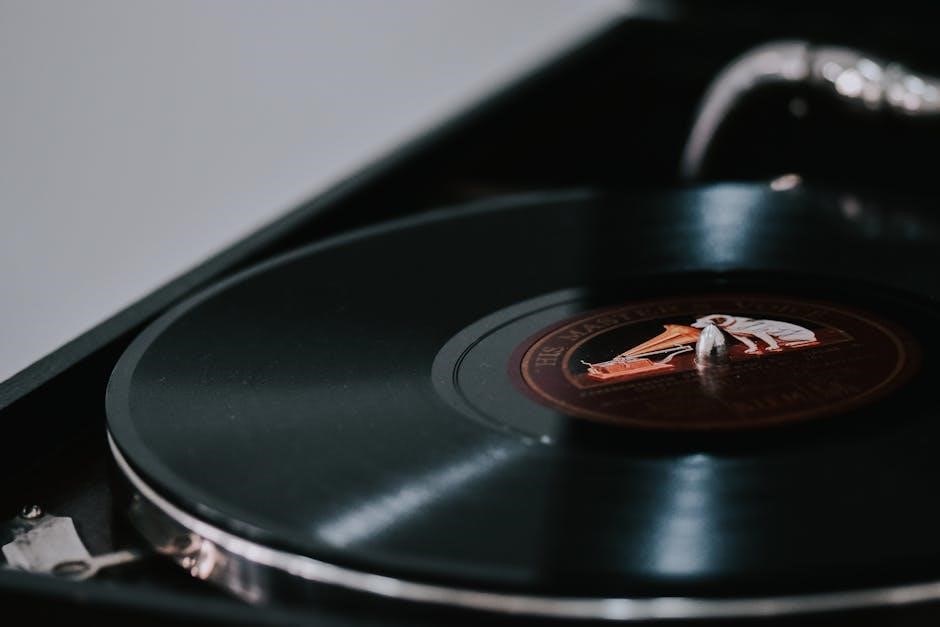
Let’s Get Acquainted: Begin by identifying the Turntable Platter – the rotating disc where records are placed. Next, locate the Tonearm, featuring the Cartridge and delicate Stylus (needle). The Motor, usually beneath the platter, drives the rotation.
The Control Panel houses the Power Switch, Speed Selector (33 1/3, 45, 78 RPM), and Playback Controls (Start/Stop). Identify the Speaker Connections (RCA outputs) for external speakers. Note the Power Supply input. Familiarize yourself with the Dust Cover for protection. Understanding the location and function of each part will simplify setup, operation, and troubleshooting. A diagram within this manual visually illustrates each component for easy reference.
Speaker Connections and Setup
Enhance Your Audio: Your Crosley record player features RCA output jacks (red and white) on the rear panel for connecting external speakers. These outputs allow you to bypass the built-in speakers (if equipped) for a richer, more immersive sound experience.
Connect corresponding colored RCA cables from the record player to the input jacks on your powered speakers or receiver. Ensure a secure connection. If using powered speakers, verify they are switched on and volume is adjusted appropriately; For receivers, select the correct input source. Proper speaker placement is crucial for optimal sound quality; position speakers equidistant from the listening area. Always power off both the record player and speakers before making any connections.
Power Supply Information
Reliable Power is Key: Your Crosley record player operates on standard household AC power. Before connecting, always verify that the voltage indicated on the unit’s power label matches your local voltage supply to prevent damage. Use only the provided power adapter; using an incompatible adapter could result in malfunction or safety hazards.
The power cord should be connected to a properly grounded outlet. Avoid overloading the outlet with multiple devices. Protect the power cord from physical damage – do not allow it to be walked on or pinched. If the power cord is damaged, discontinue use immediately and contact customer service for a replacement. Never attempt to repair the power cord yourself.
Operating Instructions
Getting Started: To begin, ensure your record player is placed on a stable, level surface. Connect the power supply and turn the unit on using the power switch, typically located on the rear or side. Carefully place a vinyl record onto the turntable platter. Select the appropriate playback speed – 33 1/3 RPM for LPs, 45 RPM for singles, or 78 RPM for older records – using the speed selector switch.
To initiate playback, lift the tonearm using the cueing lever and gently position the stylus above the record’s lead-in groove. Lower the tonearm with the cueing lever to start the music. To stop playback, lift the tonearm and return it to its rest. Always handle the tonearm with care to avoid damaging the stylus.
Powering On and Off
Initial Power-Up: Before enjoying your Crosley record player, connect the provided power adapter to a suitable electrical outlet. Locate the power switch – it’s commonly situated on the unit’s rear panel, though some models may have a side-mounted switch. Turning the switch to the “On” position activates the turntable and associated electronics.
Safe Shutdown: To power off the record player, simply toggle the power switch back to the “Off” position. Disconnecting the power adapter from the outlet when not in use is recommended for energy conservation and to protect the unit from potential power surges. Avoid abruptly disconnecting power during playback, as this could potentially cause minor wear on the components.
Selecting Playback Speed (33 1/3, 45, 78 RPM)
Speed Selection: Your Crosley record player accommodates various record speeds: 33 1/3 RPM (for LPs), 45 RPM (for singles), and 78 RPM (for older records). A speed selector switch, typically located near the platter, allows you to choose the correct speed for your vinyl. Ensure the correct speed is selected before placing a record on the turntable.
Proper Setting: Incorrect speed selection will result in distorted or inaccurate playback. For most modern LPs, 33 1/3 RPM is the standard. 45 RPM is used for smaller, single records. Older shellac records require 78 RPM. Double-check the record label to confirm the appropriate speed before starting playback to preserve your vinyl’s quality.
Starting and Stopping Playback
Initiating Playback: After selecting the correct playback speed and gently placing your record onto the turntable platter, use the cueing lever to lower the tonearm onto the record’s edge. This initiates playback. The tonearm will automatically traverse the record grooves, delivering the audio through your connected speakers.
Stopping Playback: To halt playback, lift the cueing lever to raise the tonearm. This disengages the stylus from the record. Avoid manually dragging the tonearm across the record surface, as this can cause damage to both the record and the stylus. Always use the cueing lever for smooth and safe operation. Proper handling extends the life of your vinyl collection and equipment.
Troubleshooting Common Issues
Experiencing problems? This section addresses frequent concerns. No Sound: Verify speaker connections, power supply, and volume levels. Ensure the correct input source is selected on your amplifier or speakers. Record Skips/Jumps: Clean the record and stylus thoroughly. Check for scratches or damage on the vinyl. A warped record can also cause skipping. Turntable Not Spinning: Confirm the power cord is securely connected. Ensure the unit is switched on. If the issue persists, contact customer support.
Before seeking repair, review these simple solutions. Remember to always handle your record player with care and consult the full manual for detailed guidance. Prioritize safety and avoid attempting unauthorized repairs.
No Sound Output
Encountering silence? Several factors can cause a lack of audio. First, meticulously check all speaker connections to ensure they are firmly in place. Verify the power supply is correctly plugged in and functioning. Confirm the volume control on both the record player and connected speakers or amplifier is turned up sufficiently.
Next, ensure the correct input source is selected on your amplifier or powered speakers – often labeled ‘AUX’ or ‘Line In’. If using headphones, test those to isolate the issue. A faulty cable can also be the culprit; try a different one. If problems persist after these checks, consult the broader troubleshooting section or contact Crosley customer service for assistance.
Record Skips or Jumps
Experiencing frustrating skips? Several issues can cause this. First, ensure the record itself is clean and free of dust or scratches – these are common culprits. Verify the record player is placed on a stable, level surface to minimize vibrations. A warped record can also cause skipping; unfortunately, these are often difficult to remedy.
Check the tracking force and anti-skate settings, as improper adjustment can lead to skipping. A worn or damaged stylus (needle) is another frequent cause; consider replacement if it’s old or shows signs of wear. Finally, ensure nothing is obstructing the tonearm’s movement. If skipping persists, consult a professional for further diagnosis.
Turntable Not Spinning
Is your turntable refusing to spin? Begin by verifying the power connection – ensure the unit is securely plugged into a working outlet. Check the power switch is in the ‘on’ position. If using batteries, confirm they are fresh and correctly installed, observing proper polarity. Inspect the drive belt (if applicable) for breakage or slippage; a replacement may be necessary.
Sometimes, a build-up of dust or debris around the spindle can impede rotation. Gently clean this area. If the motor seems to hum but the platter doesn’t move, a motor issue might exist, requiring professional attention. Avoid forcing the platter; this could cause further damage. Always disconnect power before any internal inspection.
Maintenance and Care
Preserving your Crosley record player’s performance requires regular maintenance. Dust accumulation can affect sound quality and component lifespan; routinely wipe down the exterior with a soft, dry cloth. Avoid harsh chemicals or abrasive cleaners. Periodically clean the platter and stylus to remove dust and debris – a stylus brush is ideal for this purpose.
Proper record care is equally crucial. Regularly clean your vinyl records to prevent dust from transferring to the stylus. Consider replacing the stylus periodically (typically after 1000 hours of use) to maintain optimal sound fidelity and prevent record damage; Store your record player in a cool, dry place, away from direct sunlight and extreme temperatures.
Cleaning Your Record Player
Maintaining a clean record player is vital for optimal performance and longevity. Begin by disconnecting the power supply before any cleaning procedures. Use a soft, dry cloth to gently wipe down the exterior surfaces, removing dust and fingerprints. Avoid using liquid cleaners directly on the unit, as they could damage internal components.
For the platter, a slightly damp (not wet!) cloth can be used, followed by immediate drying. Pay particular attention to the tonearm and stylus area, ensuring no dust accumulates. Regularly dust the turntable base and surrounding areas. Avoid abrasive cleaners or solvents, as these can harm the finish. Consistent, gentle cleaning will keep your Crosley record player functioning beautifully for years to come.
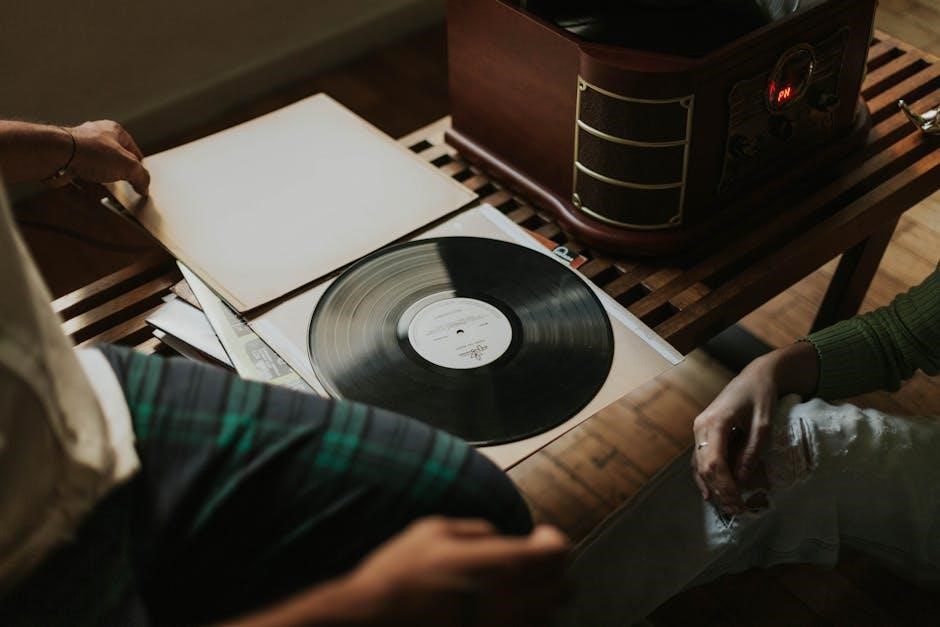
Record Cleaning Best Practices
Proper record cleaning significantly enhances sound quality and extends the life of both your records and stylus. Before each play, use a carbon fiber brush to gently remove loose dust and debris from the record surface, following the grooves’ direction. For deeper cleaning, consider a record cleaning solution specifically designed for vinyl.
Apply the solution sparingly with a microfiber cloth, wiping in a circular motion. Always dry the record with a separate, clean microfiber cloth before playing. Avoid using household cleaners or solvents, as these can damage the vinyl. Regular cleaning prevents dust buildup, reducing wear and tear and ensuring optimal audio fidelity. A clean record is a happy record!
Stylus Replacement
Regular stylus replacement is crucial for maintaining sound quality and preventing damage to your vinyl records. The stylus, or needle, wears down over time, impacting audio fidelity and potentially scratching your records. The frequency of replacement depends on usage, but generally, every 500-1000 hours is recommended.
Before replacing, ensure the record player is powered off. Gently remove the old stylus, following the manufacturer’s instructions – typically involving a small lever or clip. Carefully install the new stylus, ensuring it clicks securely into place. Incorrect installation can damage both the stylus and the cartridge. A fresh stylus delivers clearer sound and protects your valuable record collection.
Advanced Features (Model Dependent)
Certain Crosley record player models offer enhanced functionality beyond basic playback. Bluetooth connectivity allows wireless streaming from smartphones and tablets, expanding your listening options. Utilize the Auxiliary Input/Output for connecting external devices like CD players or amplifiers, creating a customized audio setup.
The integrated Headphone Jack provides a private listening experience, ideal for late-night sessions or shared spaces. Explore these features through your model’s specific instructions. Remember that availability varies; consult your product’s documentation for detailed guidance on utilizing these advanced capabilities. Enjoy the versatility and convenience these features bring to your vinyl experience!
Bluetooth Connectivity
Enable Bluetooth on your smartphone or tablet and activate pairing mode. On your Crosley record player, initiate Bluetooth discovery – typically by pressing and holding the Bluetooth button until the indicator light flashes. Select your Crosley player from the list of available devices on your mobile device.
Once connected, you can wirelessly stream audio to your record player’s speakers. Ensure a stable connection for uninterrupted playback. The Bluetooth range is typically around 30 feet. Interference from other wireless devices may occur. If experiencing issues, try moving closer to the record player or reducing interference. Enjoy seamless music streaming with this convenient feature!
Auxiliary Input/Output
Auxiliary Input allows you to connect external audio devices, such as smartphones or MP3 players, to your Crosley record player using a standard 3.5mm audio cable (not always included). Plug one end of the cable into the headphone jack of your external device and the other into the “Aux In” port on the record player. Select the “Aux” input mode on your record player to listen through its speakers.
Auxiliary Output enables you to connect your record player to external speakers or an amplifier for enhanced sound quality. Use a 3.5mm audio cable to connect the “Aux Out” port on the record player to the input of your external audio system. Ensure the volume levels are appropriately adjusted on both devices for optimal listening.
Headphone Jack Usage
Your Crosley record player is equipped with a standard 3.5mm headphone jack, providing a private listening experience. When headphones are plugged into the jack, the sound output to the built-in speakers is typically muted, directing the audio solely to your headphones. This feature is ideal for late-night listening or when you prefer not to disturb others.
To use the headphone jack, simply connect your headphones to the designated port. Adjust the volume on both your record player and headphones to a comfortable level. Be mindful of prolonged exposure to loud volumes, as it can potentially damage your hearing. Removing the headphones will usually restore audio output to the speakers automatically.
Customer Support and Warranty Information
Need Assistance? Crosley Radio is dedicated to providing excellent customer support. For questions, problems, or missing parts, please contact our Customer Service team before returning the product to the store. Our representatives are available Monday through Friday, from 8 a.m. to 8 p.m. EST. You can reach us through the official Crosley website at www.crosleyradio.com.
Crosley products are warranted against defects in materials and workmanship. Please retain your proof of purchase for warranty claims. Detailed warranty information and registration can be found on our website. We strive to ensure your complete satisfaction with your Crosley record player!
Contacting Crosley Customer Service
We’re Here to Help! If you encounter any issues with your Crosley record player, our dedicated Customer Service team is ready to assist you. Before initiating a return to the store, we encourage you to contact us first – we can often resolve problems quickly and efficiently.
You can reach our friendly representatives Monday through Friday, between the hours of 8:00 AM and 8:00 PM Eastern Standard Time (EST). The quickest way to connect with us is by visiting our comprehensive support website at www.crosleyradio.com. There you’ll find FAQs, troubleshooting guides, and contact forms for personalized assistance. We value your business and are committed to ensuring a positive experience!
Warranty Details and Registration

Protect Your Investment! Your Crosley record player is covered by a limited warranty against defects in materials and workmanship. To understand the full scope of your warranty coverage, including duration and exclusions, please visit our website at www.crosleyradio.com and review the official warranty documentation.
We strongly recommend registering your product online upon purchase. Registration allows us to efficiently process any warranty claims and keep you informed about important product updates and promotions. Failure to register does not invalidate your warranty, but it may delay the claims process. Ensure you retain your proof of purchase, as it will be required for any warranty service requests. Changes or modifications not approved by Crosley may void the warranty.
Frequently Asked Questions (FAQ)
Need Quick Answers? Here are some common questions from Crosley record player owners. Q: My record player isn’t producing sound. A: Ensure all connections are secure, the volume is turned up, and the correct playback speed is selected. Check the power supply. Q: The turntable spins unevenly. A: Verify the record player is on a level surface and free from vibrations. Q: How do I contact customer service? A: Visit www.crosleyradio.com for contact information.
Q: What if my record skips? A: Clean the record and stylus. Q: Is a polarized plug necessary? A: Yes, it’s a safety feature; do not attempt to bypass it. For further assistance, please consult the complete owner’s manual or our online support resources.